Hi all!
Okay... I know the toy soldier folks out there don't need this, but...
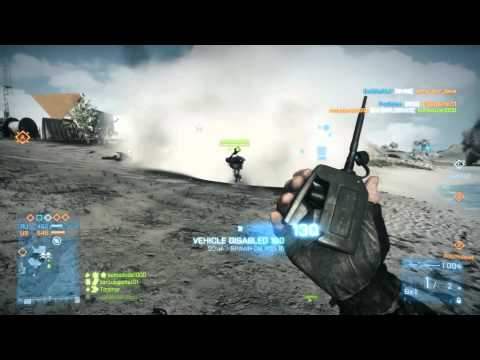
I do play a lot of games, both tabletop and electronic. My favorite is an XBOX game; Battlefield 3. I have never played a more perfectly balanced video game in my life... you can fly planes, attack choppers, transport choppers... you can drive light armored vehicles and jeeps and armored jeeps and tanks and troop transports... or you can hoof it. But no matter what approach you take, every one has its strengths and its weaknesses!
I wanted to talk tactics for this game a bit in a few blog posts. Now, the vast majority of my posts will still be toy soldiers, so fear not. However, once in a while it will be Battlefield 3 time!
Battlefield 3
And today I want to start by talking about the tank in BF3, and giving you some handy BF3 tank tactics and tips!
Now... I'll be honest. My first choice in BF3 is ALWAYS driving a tank. Second choice? Machine gunning in a tank. Third choice? CITV in a tank! I just love tanks, because they are big brutes, and they require the most teamwork of any of the vehicles in the game (along with the transport chopper, maybe).
So.
Battlefield 3 Tank Basics
Okay... so, all tanks have three spots; the driver/gunner, the machine gun, and the CITV. Each is ESSENTIAL.
Obviously the driver/gunner is the key component. He is the guy who keeps the tank moving, gets it into cover, and who fires the big gun. Depending on what you are fighting, he is also the designated repair guy, as long as there is no armor around. Drivers should also usually pack a Stinger missile to engage pesky air targets... let the machine gunner cover the driver when he is out of the tank.
(And btw... I know everyone knows this, but when you are repairing a tank ALWAYS keep the body of the tank between you and any potential enemy, and keep moving as you repair so snipers can't get you too easy.)
The machine gunner is pretty damn key too, though. Sure, the main gun can be used to kill infantry, but the machine gunner is the best at keeping away those pesky C4 guys. Don't waste time shooting at choppers and tanks, though... in the end, you'll just tick them off and make them look for you. If your tank is engaging enemy armor, the machine gunner should also be the repair guy.
The CITV is a HUGE spot in the tank. Okay, it is a late unlock. So what? Get working! The CITV should always be scanning for mines, so that your driver can focus on moving and shooting. The CITV is also the one who should be constantly spamming select to mark targets, and of course locking every chopper in sight (and every tank, when there are no choppers in sight!)
Those are the basic positions in the tank. Whenever possible you want to keep them filled. In fact, it is often better to have a machine gunner/CITV than another tank, as crazy as that sounds, although if you DO have two tanks rolling make sure one of those drivers (the REAR one, as the CITV has a longer range than the Guided Shell... if the front guy gets in the CITV the back will be out of range!) are ready to jump into their CITV to lock up enemy birds.
Now... what gear should you pack, as the driver?
Battlefield 3 Tank Load-outs
What is the perfect BF3 tank loadout?
I always run the following;
guided shell, proximity sensors, and smoke.
Guided shell is a MUST HAVE. Forget the shell itself. While guided shell can make short work of things like MAVs and the like, you REALLY want guided shell to take advantage of your tank's CITV and nearby SOFLAMs. As long as you have guided shell and a partner who can laser designate, you are able to kill almost anything. Attack choppers in particular are GREAT fun. Just get a laser lock. Then lock on your guided shell. Wait a second, to see if the pilot is an amateur who will fire off flares early (they will distract a guided shell once in a blue moon...) Then... blammo! Choppers are dead meat against a well driven tank. Just watch out for those chopper pilots who get above you and don't give you time to lock. In that case, either A) bail out and hit them with a Stinger, B) drive away, fast, into a building, C) bail out, or D) if you KNOW there is another tank out there, hop into the CITV and lock him up, and cross your fingers and pray that someone else blows him out of the sky!
The only chance a chopper has to survive once a guided shell is in the air is either A) firing off ECM, which can cause you to miss, B) diving RIGHT at you, which only sometimes works, or C) diving into close cover, and your shell might hill an obstacle. But you'll quickly find that a chopper pilot will then end up staying too low to be very effective on the battlefield, allowing you to almost "suppress" the chopper by constantly keeping your eye on him. Good stuff.
Next up is
proximity sensors. They are NEEDED, especially on maps like Seine Crossing, because there is NOTHING as annoying and cowardly as those C4 idiots running up to blow up your tank in what is really the single most irritating and unrealistic concession to VIDEOGAMESYEAHHH!!! that BF3 made.
The only time you DON'T need prox is if you KNOW your machine gunner or CITV mate, and THEY have to on. In that case take your Reactive Armor. Then just make sure that the DRIVER is the one who hops out and does repairs when you are being engaged by enemy infantry. This is the IDEAL loadout for a tank, but I find that depending on someone else for Prox is juuust a touch too dangerous.
Remember, btw... if whoever has prox jumps out of the tank, the remaining crew is blind... so, in a fight against armor, if the machine gunner (who hopefully has prox) jumps out to repair then you better keep an naked eye out of a C4 guy running up!
Finally comes
smoke. Smoke is just essential. It keeps you alive against enemy tanks with guided shell and javelins, but FAR more importantly it keeps you alive against air power, which is the enemy of all armor. Sure, you can still get strafed by fighters, and yes a well piloted attack chopper can still chew you up, but overall smoke will keep you alive a LOT longer on the battlefield.
So. There is the ideal loadout. Obviously you can make some substitutions if the maps dictate so... for example, guided shell is not that useful in the cramped setting of Seine Crossing, where you might prefer to take something else in that slot. But if you want a good all-around load out, there you go.
Now. You are loaded up; how do you fight?
Battlefield 3 Tank vs Tank Tactics
Here are a few tank vs tank tactics I want to share.
First... keep moving, and try to get to their flank and back.
A lot of tankers, when they engage in tank on tank warfare, stand still. They dig in and think that will work. Well... it can, especially with an engineer behind you. But ideally you want to keep moving. If you can, get yourself to the side of the enemy tank, or even better get BEHIND them. Some tankers will get flustered to see you flanking them and leave themselves open. All you need is one or two shots to the back of an enemy tank and voila; they are DONE. Oh, and by the way... if possible, don't hit them on an angle... shots at an angle from the side or back don't do as much damage. You want to hit the enemy from as close to a 90 degree angle (i.e. perpendicular to the point of impact) as possible.
Second... use smoke. A lot. And not just for breaking locks.
There are two times that smoke is effective as a purely visual device.
First, when you have someone out repairing your tank you should ALWAYS pop smoke; it gives them at least a little cover from enemy infantry who might be eyeing your tank.
Second, in a tank-on-tank fight, try this;
First, spot your enemy using the select button.
Next, pop smoke.
Then, back up out of the smoke, but DO IT AT AN ANGLE.
Then engage your enemy using their MARKER as an aiming point or with guided shell.
If they have not spotted you, the enemy will frequently fire through the smoke in a straight line, and their shell will blaze right past the front of your now-relocated-slightly tank.
This is a very useful tactic that can REALLY frustrate an enemy.
Lastly... get good at rotating your tank when you have reactive armor.
Okay, this only works when you have a gunner or CITV with prox so you can take reactive. Here is the thing; reactive armor absorbs a hit. And that can make a BIG difference in a fight.
If you find yourself in a fight where you A) are largely standing still and B) have reactive, see if you can take the first shot on your side armor, where the reactive plate can absorb the shot. Then, as you take the shot, rotate the body of your tank so the front is now facing the enemy. This gets you one-up against them, and can make the difference in a tank-on-tank fight with no engineers repairing. If you REALLY want to get fancy you can even try to rotate so you take the first shot on the side, the second in the rear, and the third on the OTHER side... that way it isn't until the FOURTH enemy shell that you take damage. This is tricky (reloads are often faster than you can rotate) but CAN be done, and when it is, you will feel like a BOSS.
Battlefield 3 Tank vs Infantry Tactics
Okay, first up; keep moving.
ALWAYS keep moving. Most anti-tank infantry is armed with either C4, which generally needs to be ON you to work, or RPGs, which are point-and-shoot. If you can keep moving as you fight, it will make it a lot harder for the enemy infantry to hit you, and since your machine gun is pretty stable you SHOULD be able to win that fight. It is VERY very easy to put an RPG round on a tank that is standing still. It is MUCH harder to hit one that is moving even a little bit! Just be sure that your machine gunner or CITV mate is spotting for mines!
Second; spam the select button.
Whenever you are a machine gunner (or, even better, in the CITV seat) make sure you are always scanning in front of your tank and constantly hitting the select button to mark explosives in the way. The driver has a lot of responsibilities... shooting, moving, and so on. Whenever possible another member should be on the lookout for mines and to mark enemies.
Third... run someone over!
There are some dangerous zones for a tank; namely, right up on it. C4 guys and engineers with torches can make a mess of you, QUICKLY, if they get too close. So what do you do in that case? Try to run them over! You can especially squash a few enemies if you see them running towards you on prox... try driving away from them at half speed, lining yourself up with them, acting as if you aren't even aware of them. Then, when they are lined up, quickly hammer it into reverse. Often they will not react in time and SQUASH, you can run them over.
Oh... and two last things... first, if a suicide jeep is homing in on you, don't engage it as soon as you see it. Hold your fire until the last possible second... then put a round through it. Engaging too far away makes it very easy to miss, and then the jeep will be on you before you can reload. Suicide jeeps are basically like scrumptious delicious tidbits full of over-eager C4 snacks... hit them when they get close and watch them all blow up!
And lastly... die in your tank; don't EVER let the enemy take your tank. If you are in a tank and an enemy runs up on your (ahhh C4 guy C4 guy!) don't automatically jump out. When your tank is surrounded and on fire and down to 20 percent health, don't automatically ditch. Because you know what will happen in those situations? You'll get shot, and in your death screen you'll watch an enemy engineer repair your tank and drive off in it! One of your
key jobs as a tanker is NOT to let your tank fall into enemy hands. On a map like Seine Crossing or as a Russian on Canals that can be an absolute disaster. So sometimes, you have to make like Ed Smith and go down with the ship!
So! Some BF3 tank tips and tactics! I hope they are useful for the BF3 players out there. And for the toy soldier folks, no worries... I'll be back to toy soldiers with the next post:)